Autobuild LÖVE games on Travis CI
How to setup Travis CI and GitHub to automatically run tests, build .love files and Windows .exe from source for Love 2D games.
Note (2023): this guide is outdated and you probably want to use Github Actions instead
Goals
I have the code of my game written in LÖVE committed to GitHub and I want Travis CI to automatically:
- package .love file,
- build Windows executable (.exe),
- build web version of the game (experimental),
- upload builds to GitHub Releases,
- deploy web build to GitHub Pages,
- run tests (if there are any or at least test if the code compile),
- run custom build scripts (if you need to).
Connect Travis to GitHub
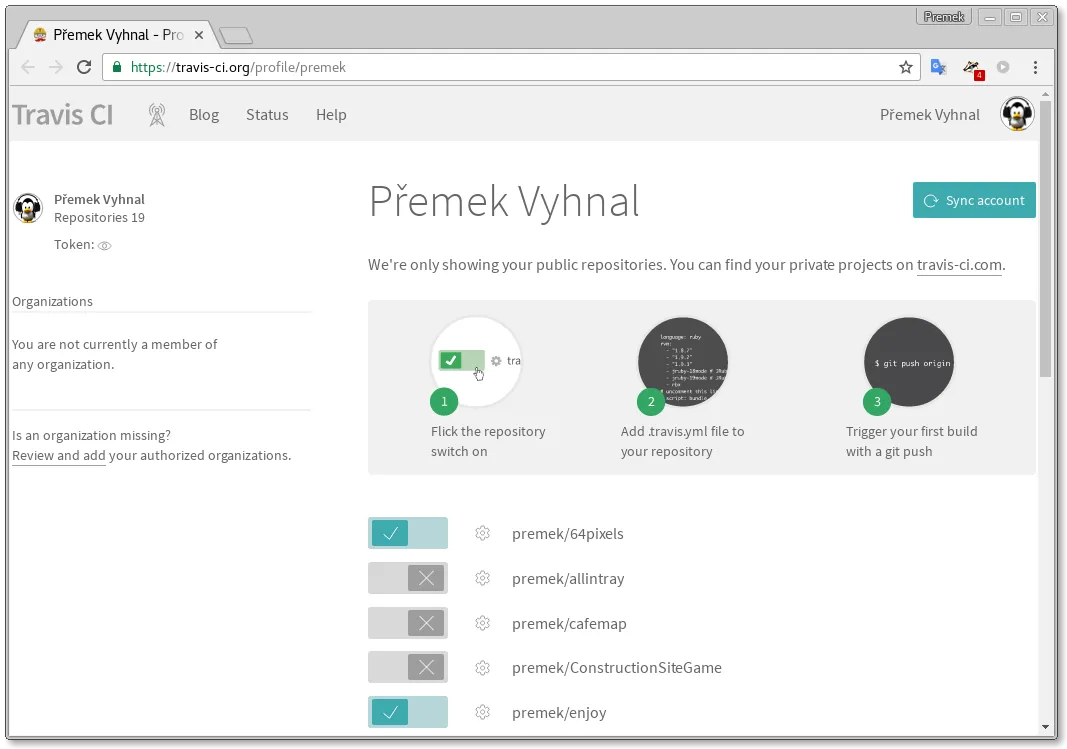
Let’s assume you have your LÖVE game ready in its own repository on GitHub. If you didn’t do it already you can now login into https://travis-ci.org/ using your GitHub account (which will be connected to Travis) and enable your repository in Travis.
Tell Travis what to build
Now you need to add a .travis.yml file to your repository to tell Travis CI what to do. An example from my game is below.
language: bash
sudo: false
install: true
addons:
  apt:
    packages:
    - lua5.1
    - python2.7
    - luarocks
before_install:
  - luarocks install --local lpeg
  - "`luarocks path`" # execute the luarocks output - sets the paths for 'local' tree

script: "[[ -n $TRAVIS_TAG ]] && ./build.sh web || ./build.sh" # web only for tags
deploy:
  provider: releases
  skip_cleanup: true
  api_key:
    # travis encrypt <token>
    secure: 2YJ2wzS9qRNrb2UMxsLlYoa6yR+h/9dWgMkLP9xUvy9tZ/Uheg5KKlrBESFd+Bz2hxjXgmoy5avEpmPLFyRF15nPW47QXbyIU0ambIALycU0cqPTzqu7uFjxSbPu7/AbT8p6jHnKpeGu3oYkDsxA3f0nRcZxJm9azcgSbMDQFlFZyVTZtCqMqVu7uVnFfbMw9EZRz6ldj/zd9TGnkECtnnx+hH2Xx3maozfsVXPJmZpRST+NfBbPqspOgPYNuxK7KKd4oBnpW3wKvMTFfnlpWmXhK9ahs/WGYfda8Xg262s25fqR/kTvnZWiVZaULL5M7Uax5xiIyU785scKJYrMkVATGss033pLhW9trXG874SHMWeozYnjemzACC0e0cLgBUpElR+M86u2R/zNA8ZHUwdrTf9TllEV6uV8yHkBxXK6ahl5ocyaYXSN/ezkzyeMstJeGLR6/TN3d3XLTfilEcsBOGJNNfACJtnnr5K7NcgyA2jVWUDF/NMyZlpQgU2TiW1SUwJG7rV5SaW0pXp1NCnH8v/HGqSzacEFzpsdhSPjqg6RGQ/SefhAZwD4COUdTzERfSJGs74xROPVKrMtmqQ56qIbhBWh6GQ0NzRTACw1wM2+skZKxekxc5xEjGZEdtgwedheaJISKSvFRbDZekZtX3+YCHOnTgMG/WYt52s=
  file:
  - target/enjoy.love
  - target/enjoy-win.zip
  - target/enjoy-web.zip
  on:
    tags: true
    all_branches: true
after_success:
- "[[ -n $TRAVIS_TAG ]] && ./build.sh deploy $TRAVIS_REPO_SLUG"
env:
  global:
   # travis encrypt GH_TOKEN=<token>
  - secure: ddpt+AFQ2nVBDaYXmODCsnwbUPyhBSN1VRwvrAzXnbgBAMGKs57tW+N4NBGQF6v32AX7G+LO4qjPumJ2f21SMH3AsPCNONzzA/kp/343oXqojVFZMyEfaE3tQOwvGteLF7RRF4AN+eTFrVEqb+ttn9ttu5yzdG0gyRt0p45bgtdGX+3S+B764nsf8jlbBaCSWM17alICW/NOefQiylNsrwRs0nR/pnUWXy+byAA2pUa3chDz4Kt6+SC5qyAD03Xap819n7IJrmejH42iAopFCpnDRCcfIh5eICp3m/cwnpwmDlH+4lkxfLPs8ZTFFkgdQKzYH8iQ9V/F9swez628oxilRR8e72e+PUCEyUdifX5XW9LqwDeQiKjbqq3/L+89EZYlxz7WtHMqAaLBXW0gGnqYnVAk0kXHbK4y1NVbUHv1TRMq1aznzXBtrsSOAaH8e4sqYx2rcZTYm1nqCleFBtQdcDL/6fTFjU6FY+g+gKfhx39YGgBBfLVDGqQ6yJ49PRJUvl1fvw4WCTdcO0YAlWk9v3AyhMiTspxavgmvZp3BpCnlJu7Ve0k9Tmf4gyVmow1D/Zgz6jMD47Gtad91aSy9LDrAUP70ywAwtVfgPoMNEh/6+brwAImNNZ2L6icvFz30nhIFUqR5Aiwy0PawcDJpXO0QXGmWRRIznLuvhAo=
Interesting parts are:
- packages — here you can install any Debian package you need for your build; we need lua for LÖVE, python is for the web build and I added luarocks which I use to install lpeg in the
before_installsection (you will not need this but you may add some other dependencies here), - script — this is a bash command that runs our main build script; here we run
./build.sh webfor tagged commits and./build.shfor all the others; more about this script below, - deploy — this section describes what files to deploy to the releases page on GitHub after a successful build; the
api_keyis used to authenticate Travis so it can upload files to your GitHub (details below), - after_success — this command is executed after a successful build of a tagged commit (see the test for
$TRAVIS_TAG) and here we call our script with the deploy command todeploythe web build to GitHub Pages, - global — here we have an encrypted authorisation token again, this time for the deploy to GitHub Pages; see below for how to generate it.
Configure access tokens
To upload the results of the build back to GitHub, Travis will need an access token to your GitHub account.
You can generate one in Settings -> Personal access tokens:
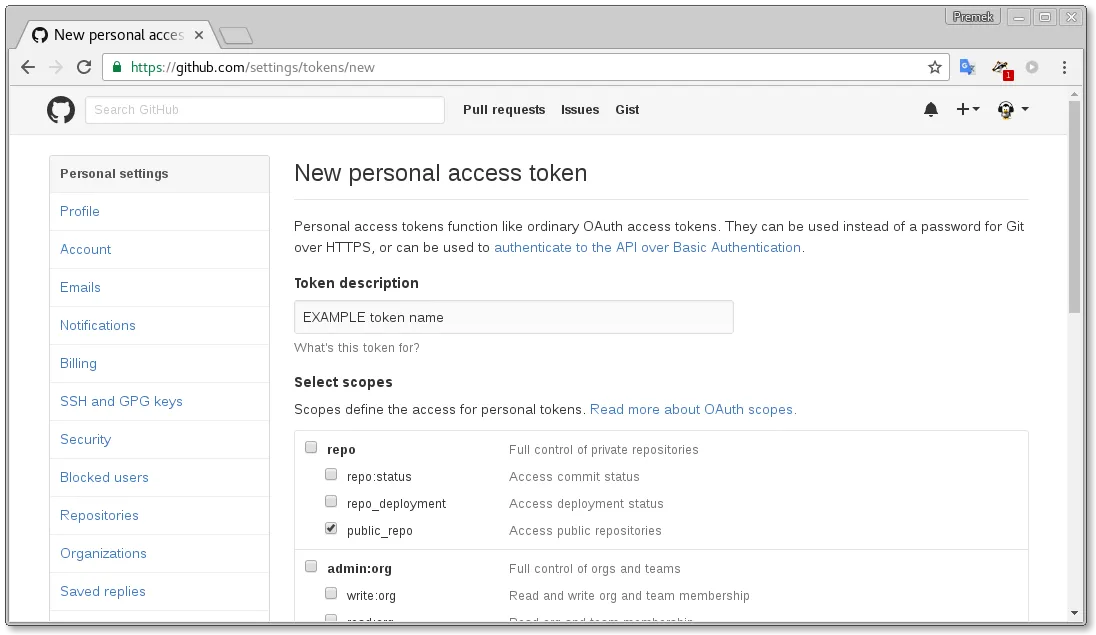
Enter any descriptive name like “travis yourgame” and tick the “public_repo” checkbox and nothing else and then click “Generate token”.
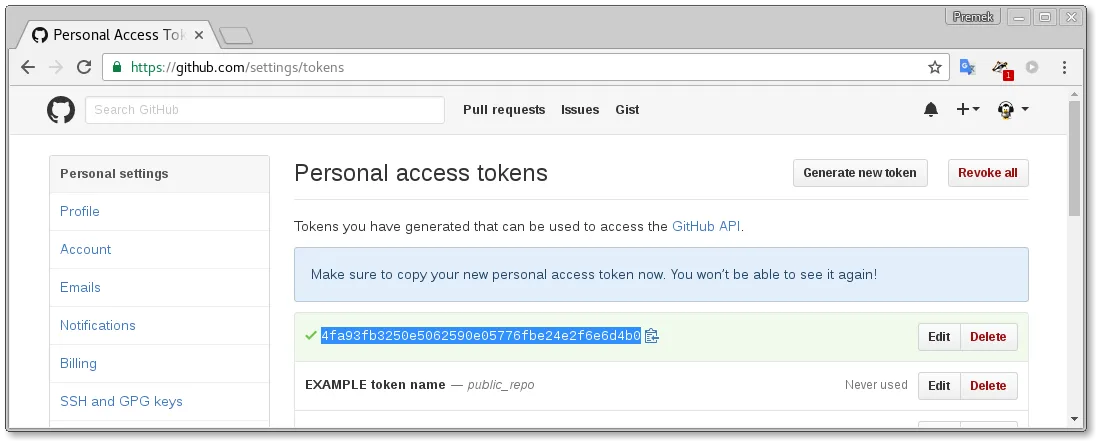
As the GitHub says “Make sure to copy your new personal access token now. You won’t be able to see it again!”. Also do not show this token to anybody like I did here (I have invalidated my token after taking the screenshot). Anyone who would know this token is able to commit to your repository. So we will encrypt the token in a moment and then forget it forever.
You can also create the token from your command line:
$ curl -u your.github.login@example.com \
-d '{"scopes":["public_repo"],"note":"EXAMPLE token name"}' \
https://api.github.com/authorizations
And look for something like this in the command output:
"token": "77527c7201c4d52e86edbdecab82d7344a2a4ca5",
Travis CLI tool
Now we need to encrypt the token so we can securely put it into the public repository. We will use the Travis CLI tool for that which takes our secret and encrypts it with a private key known only to Travis. This way we can publish the encrypted token in our repository but only Travis will be able to decrypt it and use it to write back to the repository.
This private key is unique for each GitHub repository that we connect to Travis so we need to do this again for every new GitHub repository and update the .travis.yml.
To install the Travis CLI tool:
- you will need
rubyinstalled on your computer (see ruby website for instructions), - and then run
gem install travisYou may need to use sudo or you can find detailed instructions on Travis CLI readme and Travis docs.
You can test the travis tool is installed by running this on the command line:
$ travis version
1.8.5
Encrypt the token
Now you can finally encrypt the token you generated on GitHub. We will encrypt the token twice, first for deploy to GitHub Releases and second for deploy to GitHub Pages (see the .travis.yml file example again).
Call the travis tool with the encrypt command, your secret token and your GitHub “user/repository” name:
$ travis encrypt 77527c7201c4d52e86edbdecab82d7344a2a4ca5 -r premek/enjoy
Please add the following to your .travis.yml file:
secure: "XLN7VHZT3Gh5rCf6hCSQ+Gai5G0TWOWkJbiWErL+JcRvOIimMYY9B51mTcwWphJBPicmls5jw/8TrNrjvA2J1r+KnebL1XsRxOhyms6BQ+Q5J6g+SFbR/s3vvdjzNu9ygqRCL5d1ia3haQvz/rOS31FwuhDO+zE0jLTlSP2OIMUbowMLiGXb4mU0ib7voxnFyRJggaxLa4fFhVAbZu2HJILbFwBHc6tgAGRRTMoptnsmjmF5qBFJfbU70oE+vdOjOUCYwPaT1J+lK/eT6DeaY9i5SbCy1J4iz0AMiPzdi/3pLzX5qmYgjdDHH8cNgUiBXvCEgb28y3pI4b058Ehym+b1eeAHso0SHPy2pKht82e07XNdK/5kzjHUagMptzn4jT6ZWAhM0p1jxJ+3J/m2EsLSvoITNQi6eV5Y9O4ky6EGttHlLE6TrkdXprQQkkmgYN8/59RbM10aVtNWwOLZD5OSPBLyDi3/3qpxyEpZJZNHJK2lGur+YMPChzmZAZ1M9K/bQjYocsuZx4fzXfyKFg+yhmqvtgkqFf5RcOwsMVoLxwhunORTnktvL27pkpJPQwQi7zRTS7x+LRtt3QEa5ZLPSUSP072NkRuF8hZLlEQqZ3fv7UXR0XZxta7EC1/jbpueKx17cKYjtFREfo9Fpzfhpch0a94iziQ2TZH093o="
Pro Tip: You can add it automatically by running with --add.
The suggested --add option didn’t always worked fot my but you can copy the secure: ... part into the deploy section of your .travis.yml.
Then call the travis tool again, with the same token but in the form of GH_TOKEN=token:
$ travis encrypt GH_TOKEN=77527c...4a2a4ca5 -r premek/enjoy
Please add the following to your .travis.yml file:
secure: "DI8s6WpIAIE6aw1ZzFxF5kysby+7hATLKDREJ2IMz8zT2wUKFn0m11emDD0AfGpMrPCtzx2nsTng0XxJRv282tVsyYXaar9f9uGZEijhzRqGni7SxuR8lgsuSZL3bVGHY9ow+6l8GaFeENNeWziCfUVoynzAlonlIQJfBZUgwt3+i/0IiG2hgU54RVGreTmCBIhErECLvDhmxbEurE8MJfQDUBMcsxb9Sj7H1g9klhULNi4rPcWjTwIBjQrZZP93UoS4WWReLhTITDdeOk6Aj0CLBF2H/343S5KK9GUuJpmCQns6aXAL3XenEBNsp9H+VUBQIi7nMzsjnHAcv4fzaL0ADa+YnIdLKmITUCWfVBxrP+APKwgIQxqFoMynB6+FN7Ed1cFPWsmBI7JsGNnUTHx+xIEtscKu9pPfiFt2mYmdgKUjpPVU8aM115Xj5zcqXRFWuuyWjmnV75h4SDkzIbg66S6wEr3BVDHZgTBRba5qGH+e6SVydkLdtJiQCkwpCGj8mgJsn7ZlQupotHksOH2+qziebmwTfYJb7LL9fe22EETJTrm36YWt9A6rFHFjhIH86bPIIoDJm9iCb/BEIh/nPo7+JMyKuai/vCy7PRcZA1/nEwblF04ypq1HGKq+vskgn0QF7rmG3onIb31w2rpvu6hS3Vy1jP/7istpi4g="
Pro Tip: You can add it automatically by running with --add.
And copy the secure: ... part into the global part at the end of your .travis.yml.
That should be it for the .travis.yml file.
Custom build script
Let’s look at a script I use. It is in the build.sh file referenced from the .travis.yml.
#!/usr/bin/env bash
set -x

P="enjoy"
LV="0.10.1" # love version
LZ="https://bitbucket.org/rude/love/downloads/love-${LV}-win32.zip"

### clean
if [ "$1" == "clean" ]; then
 rm -rf "target"
 exit;
fi

### deploy web version to github pages
if [ "$1" == "deploy" ]; then
 cd "target/${P}-web"
 git init
 git config user.name "autodeploy"
 git config user.email "autodeploy"
 touch .
 git add .
 git commit -m "deploy to github pages"
 git push --force --quiet "https://${GH_TOKEN}@github.com/${2}.git" master:gh-pages
 exit;
fi

##### build #####
find . -iname "*.lua" | xargs luac -p || { echo 'luac parse test failed' ; exit 1; }
mkdir "target"

### .love
cp -r src target
cd target/src

# compile .ink story into lua table so the runtime will not need lpeg dep.
lua lib/pink/pink/pink.lua parse game.ink > game.lua

# .love file
zip -9 -r - . > "../${P}.love"
cd -

### .exe
if [ ! -f "target/love-win.zip" ]; then wget "$LZ" -O "target/love-win.zip"; fi
unzip -o "target/love-win.zip" -d "target"
tmp="target/tmp/"
mkdir -p "$tmp/$P"
cat "target/love-${LV}-win32/love.exe" "target/${P}.love" > "$tmp/${P}/${P}.exe"
cp  target/love-"${LV}"-win32/*dll target/love-"${LV}"-win32/license* "$tmp/$P"
cd "$tmp"
zip -9 -r - "$P" > "${P}-win.zip"
cd -
cp "$tmp/${P}-win.zip" "target/"
rm -r "$tmp"

### web
if [ "$1" == "web" ]; then
cd target
rm -rf love.js *-web*
git clone https://github.com/TannerRogalsky/love.js.git
cd love.js
git checkout 6fa910c2a28936c3ec4eaafb014405a765382e08
git submodule update --init --recursive

cd release-compatibility
python ../emscripten/tools/file_packager.py game.data --preload ../../../target/src/@/ --js-output=game.js
python ../emscripten/tools/file_packager.py game.data --preload ../../../target/src/@/ --js-output=game.js
#yes, two times!
# python -m SimpleHTTPServer 8000
cd ../..
cp -r love.js/release-compatibility "$P-web"
zip -9 -r - "$P-web" > "${P}-web.zip"
# target/$P-web/ goes to webserver
fi
At the beginning there is a name of my game and it will be used in target filenames (“enjoy” here; the resulting files will be enjoy.love, enjoy-win.zip, etc).
Also we define LÖVE version to be used.
The “clean” block is executed only if we run the script as ./build.sh clean and it just deletes all the files created during the build. It is useful for local testing.
We will get back to the “deploy” part later.
Then we call luac on all .lua files to check for syntax errors. If there are any, we exit the script with 1 exit status which will mark the build as failed and Travis will send you an email about this. (If everything is OK the status is 0.)
If everything is OK we copy the src directory to target and zip everything to create the .love file. We can also run custom scripts here like I did to compile my story files into a distributable format.
For Windows .exe file we need to download LÖVE binary from the internet and concatenate it with our .love file.
The web version is built only for tagged commits (we will get back to it) and it uses the great love.js project (which is cloned from github in my build script).
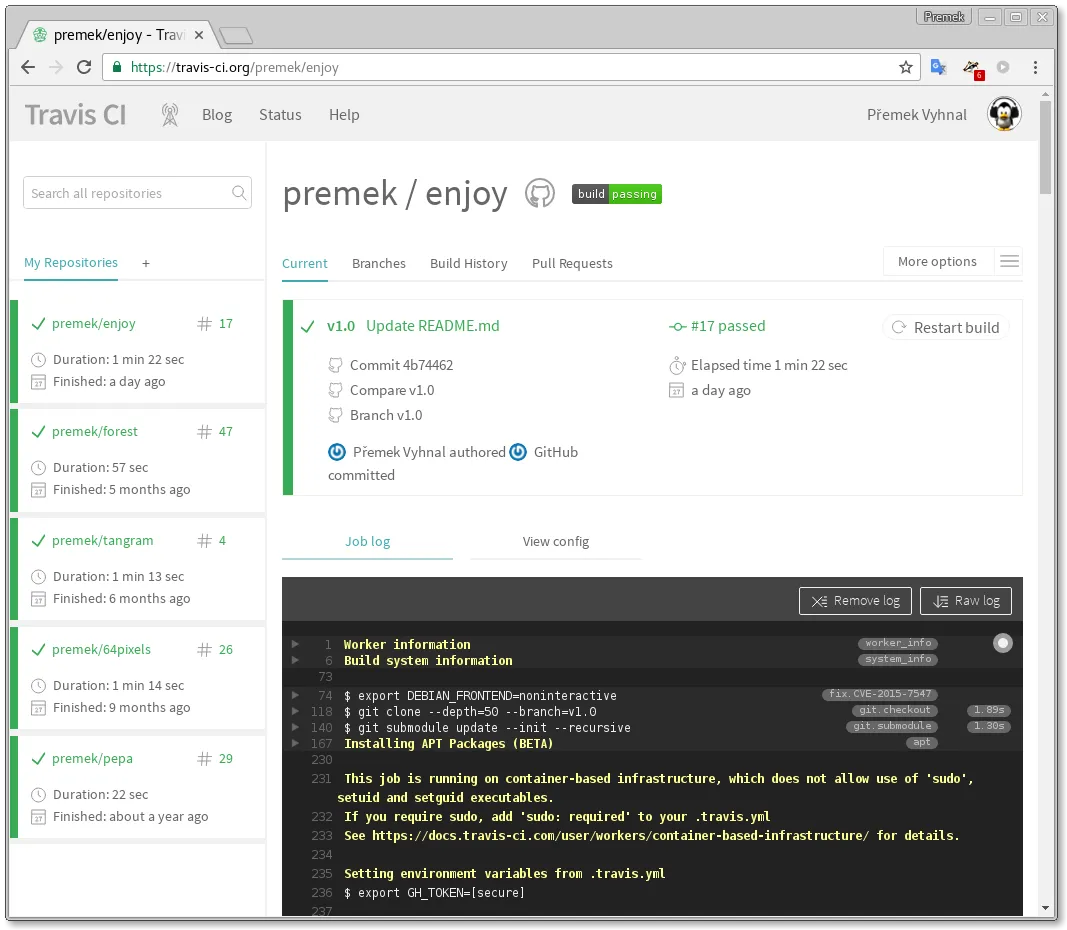
Now we should be able to make any commit to the repository and see how it is being built almost immediately on Travis:
Deploy the release
The build.sh script defined in .travis.yml file does run after each commit to the repository (to warn you in case you break something with the commit) but the web build and the deployments are done only after you make a “release” on GitHub. You can do it on the Code -> Releases tab:
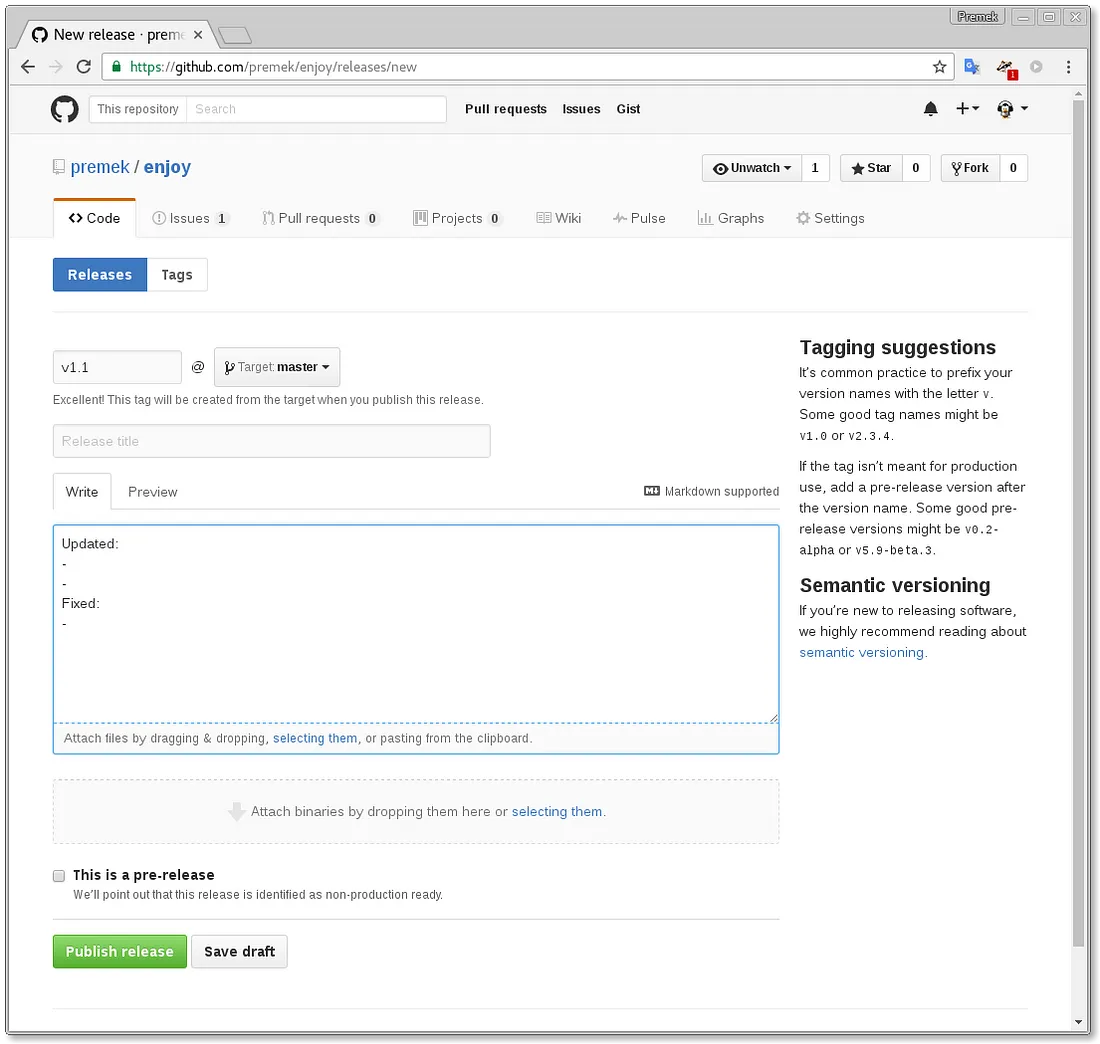
After you click Publish release, GitHub automatically creates .zip and .tar.gz archives of your source code.
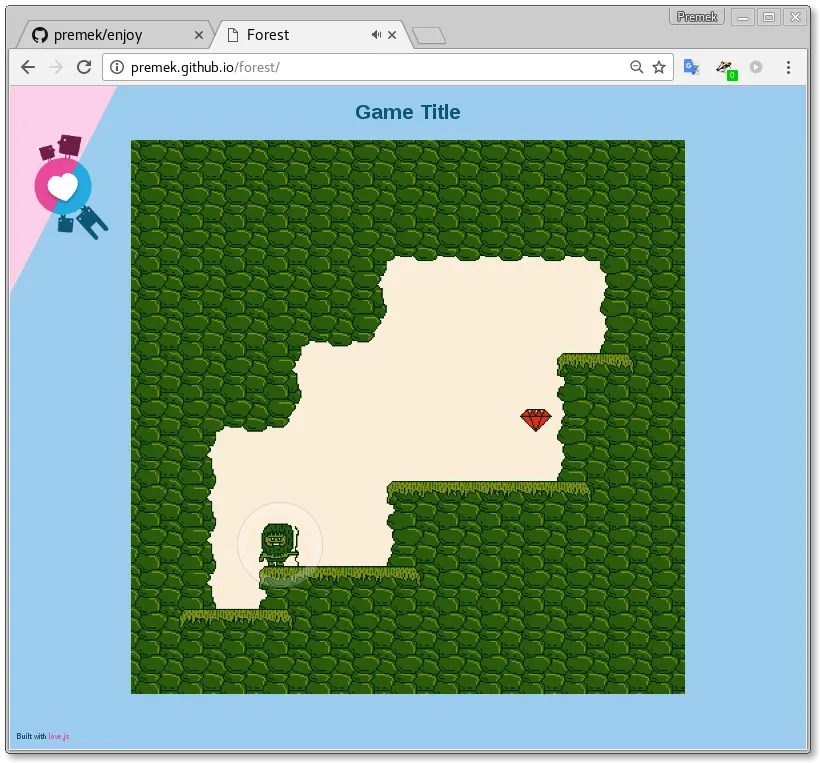
Travis will run this build with $TRAVIS_TAG set so it will trigger the build of “web” version and also the “deploy” part (see .travis.yml again). The “deploy” part will use the git command with the GH_TOKEN variable to commit the web build files to GitHub to the gh-pages branch.

This branch is a special one — everything you commit to it is avilable as a webpage on https://<user>.github.io/<repository>/:
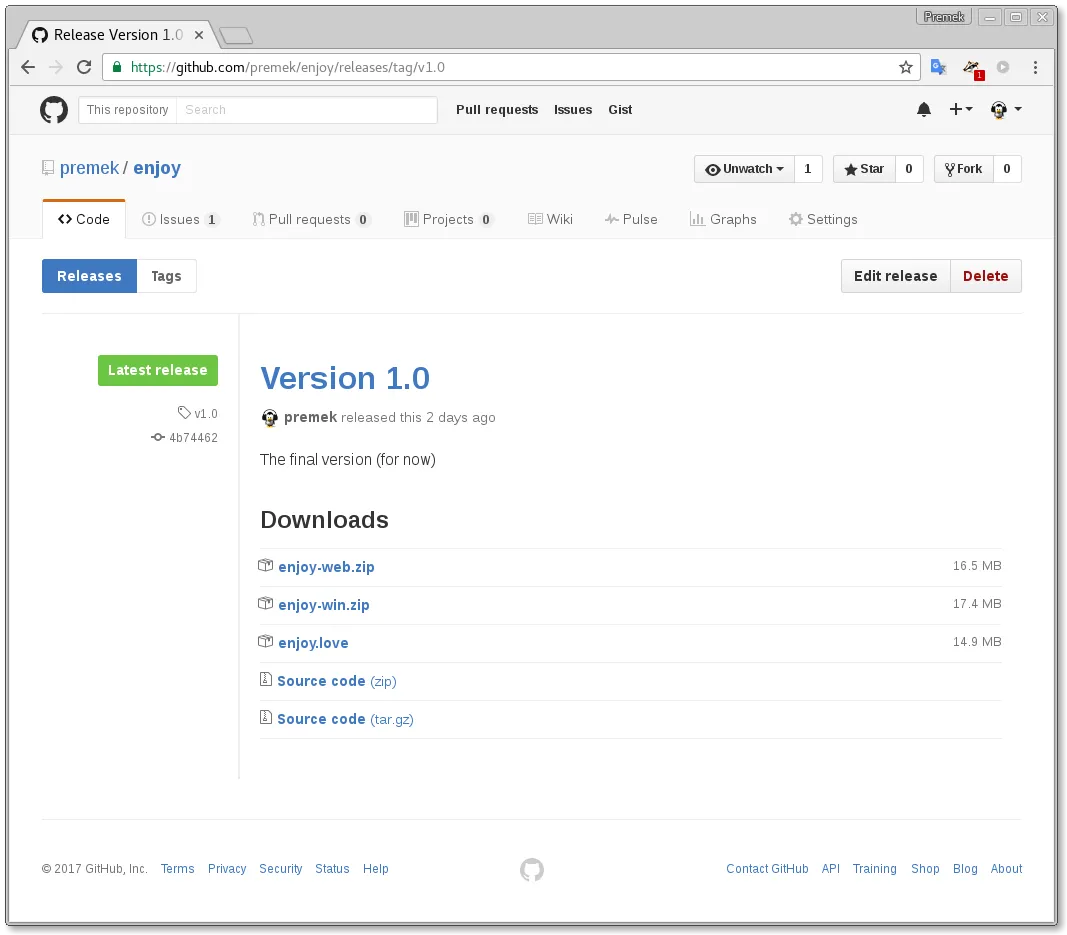
The deploy section of .travis.yml file is also executed for “release” commits and it just uploads the specified files to the release page on GitHub. So after the build we can see our .love file and the .zip containing the .exe file on our release page where there were previously just the .zip and .tar.gz source archives. You can link to these files from anywhere to allow users downloading your game.
Build status icon
As a final touch you can add a nice status icon to your readme.md file:
[](https://travis-ci.org/premek/enjoy)
What’s next?
More items to explore:
- Android builds
- Mac builds
- change the icon of the .exe using rcedit (windows only tool)
- more tests?
- love-release